The tutorials on this website were created by me, Kayde McIntyre.
Any resemlence to any other tutorial is purely coincidental
You MAY NOT translate my tutorials You MAY NOT use my tutorials for monetary gain
I do allow you to link to these tutorials to post in groups using a
TEXT LINK ONLY
Please do not take anything from this website and claim it as your own
I claim no responsibility for any users of our tutorials. Any copyright issues
or stealing issues are to be brought to the attention of the user.
I encourage my users to share their results with me @ belladonna.designs (@) yahoo.com.
BY USING MY TUTORIALS YOU ARE AGREEING TO MY TERMS OF USE
Tuesday, May 18, 2010

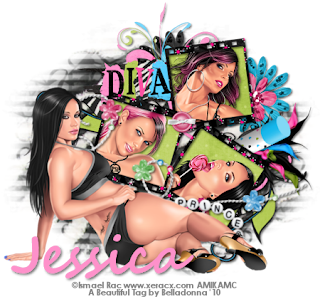
Diva


READY TO START? YOU WILL NEED TO HAVE A WORKING KNOWLEDGE OF PSP.

THANK YOU TO THE TALENTED CREATORS OF MY SUPPLIES

SUPPLIES NEEDED:
Tube/Photo of Choice: Ismael Rac
You can purchase a license to use his work here.
Scrapkit of Choice: Hope by Scraps by Jessica
You can download the kit here.
Mask of Choice: WSL_Mask105
You can download this mask here.
Font of Choice: Segoe Script
Written in PSPX1

Open a new 600x600px canvas and flood fill white.
Add your first paper. This will be your background image.
I'm using the zebra print paper from Jessica's kit.
Now get your frame and paste it over the paper layer.
This lets us know the general area we need to place the mask.

Select your paper layer and in your toolbar go to
LAYERS->LOAD/SAVE MASK->LOAD MASK FROM DISK
Select your mask of choice. Now right click on mask layer
Merge Group.

Now we shall place our elements.
There is no general order to my placement.
I just randomly jump back and forth adding things
here and there until I like the placement.
If I wrote every element and where I put them
I would probably win the guiness book of records
for the longest tutorial lol.

My best advice would be to just put a few things here and there.
Don't go crazy. Counting the white background and mask
I only have a total of 13 layers.

Anyway... Time to add our tubes.
You can actually use just one tube, but I LOVE Rac so I decided
to use four ha. Place your tube behind the frame layer.
You use your magic wand tool to select the inside
of the frame. CTRL + SHFT + I to invert the selection.
Now select your tube layer and delete.
This should delete the excess tube from outside the frame.

Repeat this step for all three frames.
You can now paste your main tube on top of all layers.
Time for your name :)
Get your text tool to do this.
Now we'll add a nice drop shadow to all layers.
I'm using the settings 2 2 73 5 on all.

DON'T FORGET TO ADD YOUR COPYRIGHT INFO!!!
THIS IS A MUST!

Now you can crop off the excess canvas and
save your new tag with or without white background.
If you're going to save it without make sure
to save as .png format. ;)

I really hope you enjoyed this tutorial and
I want to say an extra thanks to Jessica for this AMAZING kit!!
I fell in love with it the second I saw it =)


No comments:

Post a Comment

Note: Only a member of this blog may post a comment.