READY TO START? YOU WILL NEED TO HAVE A WORKING KNOWLEDGE OF PSP.
THANK YOU TO THE TALENTED CREATORS OF MY SUPPLIES
SUPPLIES NEEDED:
Tube/Photo of Choice: Ismael Rac
You can purchase a license to use his work here.
Scrapkit of Choice: Platinum Club by Scraps by Jessica
You can download the kit here.
Font of Choice: Blackjack
Written in PSPX1
Open a new 600x600px canvas and flood fill white.
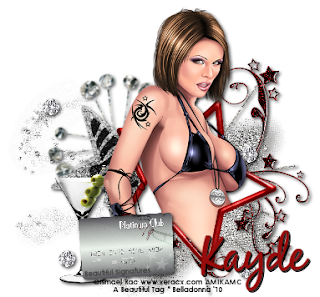
We'll start with the star frame.
Place this element in a little to the right of center on
your canvas. This will be the only frame.
Next we will place the swirl element behind the frame.
I've put mine on the right side going up.
Our next element will be the zebra star.
This element will also go behind the frame.
Our starburst type element will go behind the zebra frame.
Then we can put our glitter swirl behind that.
Now it's time for our platinum card and martini glass.
I've placed these in front of the frame in the
left corner with the martini behind the card.
Lets add our tube.
I've duplicated my tube with one
above the frame and one behind.
This makes it easier to have the tube
seem to stand out of the frame.
Get your magic wand tool and select the inside of the frame.
Go to SELECTIONS->MODIFY->EXPAND.
to expand your selection by about 4 pixels.
This makes sure that your tube isn't erased too much.
Now on the tube layer BEHIND the frame press
CTRL + SHFT + I to invert the selection.
Now press delete.
This should delete all of the tube outside of the frame.
Deselect all.
Now select your tube layer ABOVE the frame.
Get your eraser tool and slowly erase the excess
tube on the bottom of the frame.
Your second tube will ensure that you don't erase too much.
Once you've completed that it's time to add our names.
I've added the name of my blog to the card
but you can use whatever you like.
DON'T FORGET TO ADD YOUR COPYRIGHT INFO!!!
Finally, you can crop off the excess canvas and
save with or without the white background.
If you choose to save without make sure to
save as .png format!!
I hope you enjoyed this tutorial ;)


